In the previous blog titled ‘An Introduction to Gait Analysis‘, I discussed the various methods of Gait Analysis, their pros and cons, and the conditions they can be used for. In this blog, I will discuss the entire process of setting up a Gait Lab within the available budget and space.
As students or novice physios, the first images that come to mind when you hear “Gait Lab” might be pictures of expensive equipment, ample space, multiple people for interpretation, or a classic 3-D Gait Lab.
With recent technological advancements, you can perform an efficient Gait Analysis with a 2-Dimensional setup, which has become a reliable alternative to a 3-Dimensional Lab.
Read on, as I’ll take you through the process for setting up a reliable, good-quality Gait Analysis setup at your clinic.
Do you need a Gait analysis lab at your clinic?
Firstly, identify if you need a Gait Lab based on the type of patients you regularly manage.
You can consider setting up a Gait Lab if you–
- Treat lower limb surgeries, leg related conditions frequently
- Work with sports persons
- Treat neurological conditions
- Prescribe lower limb orthotics frequently
- Work with amputee rehabilitation
Requirements for a Gait Lab
The basic requirement for a 2-D Gait Lab is a digital camera and software. This setup would help analyse joint kinematics in far more detail than Observational Gait Analysis.
Overall, the pre-requisites are –
- A linear walking space (Walkway) of distance 15 feet / 5meters or a treadmill
- Non-slippery floors
- Good lighting
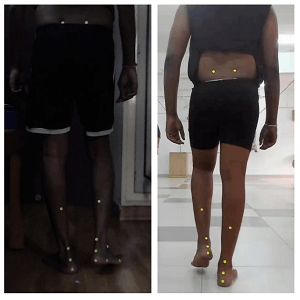
- Skin-fit clothing, in case the patient does not have any.
A. Equipment required for setting up a 2-D Gait Lab
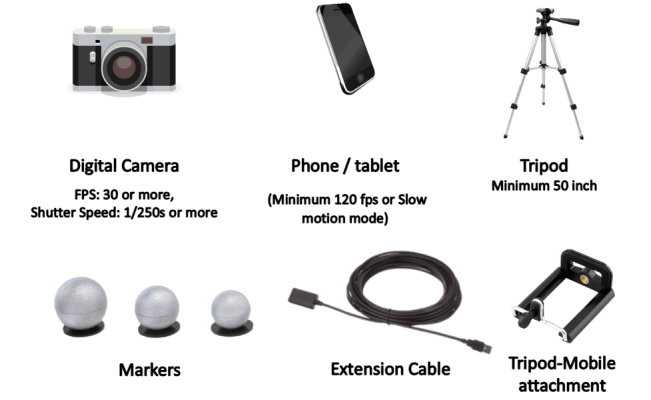
- A digital camera. It could be a dedicated camera like a DSLR or even a smartphone. (Minimum 1, maximum 4-6 depending on your need)
- Tripod or a stable surface to mount the motion-capturing devices
- Markers (Self-Adhesive stickers) to place on anatomical landmarks. You can replace markers with bright coloured tape.
- Software to analyse the captured photos or videos
- A compatible laptop, computer or phone for the software
- An appropriate surface for the patient to walk on. You may use the floor or a treadmill. It will be a clinical decision. While the floor simulates a realistic environment, a treadmill can capture better views
Setting up a 2D Gait Lab
A. Camera Placement
Before the camera placement, ask the patient to walk on the analysis surface and get comfortable.
Where you place your cameras will depend on what views you want to capture. The most commonly captured views are the anterior, posterior and lateral views. However, diagonal and top/transverse views can be captured as well.
1. Placement with one camera
Adjust the tripod height to be the same height as the patient’s ASIS. The ideal distance will depend on the point at which the patient is completely visible in the camera.
For lateral view, place the camera on the patient’s side, and ask the patient to walk back and forth. This way, you can capture the right and left lateral views.
To capture the anterior/posterior views, switch the camera location, place it in front of the patient, and ask them to walk toward and away from it. Walking towards will capture the anterior view, and walking away will capture the posterior view.
2. Placement with 2 cameras
Keep the tripod height at the ASIS level. Place one camera in front and one camera at the side of the patient. This is the most standard camera setup used in-clinic gait labs.
Ask the patient to walk back and forth to capture all 4 views.
3. Placement with 4 cameras
One camera in the front, one at the back, and one camera each on the patient’s left and right side. Here the patient need not walk back and forth but can walk a single attempt in one direction.
*Note – If you have a treadmill with one or 2 cameras, you will have to change the placement of the cameras to capture all 4 views.
If the patient is walking on the ground, they need to walk multiple laps for you to capture all views while the camera remains stationary.
B. Camera and equipment settings
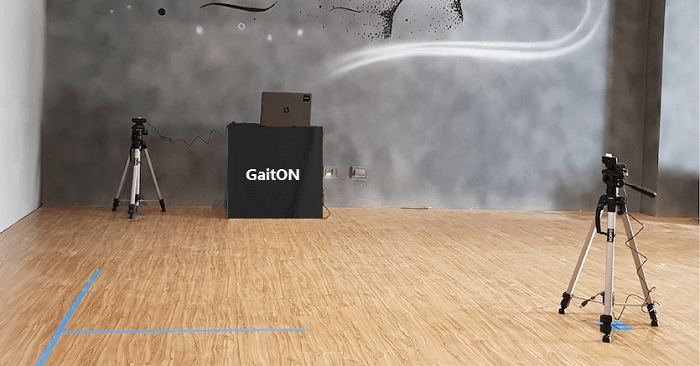
Choosing the correct camera placement and camera settings is vital to ensure the reliability of the data captured and the analysis. Following are some guidelines for a proper camera setup:
- Choose a camera or smartphone with a ‘Gridline’ feature, a slow-motion video option (120 fps or above) at 720p (HD) resolution.
- Choose a tripod with a bubble level. A good tripod should have 2 bubbles for complete camera alignment
- In camera settings, switch on the following options –
a. In case of a smartphone: Slow motion feature (120 fps or better)
b. In case of a DSLR/Digital camera with manual camera settings: 30/60 fps with a shutter speed of 1/250s or more
c. 720p (HD) or 1080p (Full HD) resolution
d. Gridlines - Mount the camera/smartphone on the tripod, preferably in landscape mode, to capture a wider area. In case of a smartphone, a mobile tripod attachment may be required
- Getting familiar with the adjustment features of a tripod is essential to adjust the camera height, camera angle, camera mounting and dismounting.
This is a good video you can view to understand the working of a tripod. - If the tripod has the bubble level, ensure that the air bubble is in the centre. This ensures that the camera is perpendicular to the ground and minimises parallax errors.
*Note –What are frames per second (fps)?
A video is a compilation of multiple photos put together, which a device does by default. When you pause a video, you’re pausing one “Photo”. Each photo is called a “frame”. When you set your camera at 120 fps, you’ll capture 120 frames in one second. 240 fps will capture 240 frames. Higher the frames, the more precise the video will be.
C. Special Considerations
You now have various options for camera placement and settings. But they can still be influenced by external factors.
Slow motion video and higher fps require better lighting than regular speed and lower fps. Higher pixels will require more device storage.
Slow-motion video will also require more device storage. A simple workaround for storing videos could be to keep a hard drive. The ideal setting with all these combinations will be your clinical decision based on what you want to assess.
While a 2-D analysis is an accepted alternative to a 3-D analysis, the quality of data capture and analysis highly depends on the clinician’s skill, directly affecting the results. Ensure you are well versed with the procedure and have practice sessions before introducing this service to your patients.
D. Do’s & Don’ts while capturing/analysing gait videos
- Ensure that all important regions of observation are exposed/covered with tight-fitted clothing
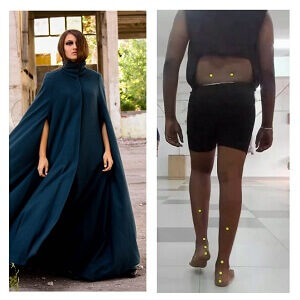
- Allow the patient some time to walk along the walkway to reduce camera consciousness
- Start your gait analysis only after the patient has taken at least 2 steps. The first stride is considered as a part of stabilizing gait. Likewise, the last stride is considered a part of de-stabilizing gait.
- Ensure that the relevant areas of the body are captured in the video.
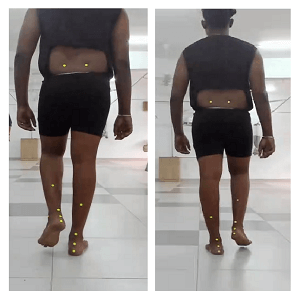
- Ensure that light sources are not behind the patient.
E. How to choose the right software for analysis?
According to Windt et al., 4 questions determine your clinical decision to invest in rehab technology
- Can you trust the information that it provides?
- Will the information promised in the new technology be helpful?
- Can you integrate, manage and analyse this new information effectively?
- Can you implement this new technology in your practice?
If the software provides all these aspects, that’s the one you’ll be most comfortable with.
Process of using a gait lab
- Assess your patient and check for the need for a gait analysis.
- Explain the need for gait analysis and take their consent.
- Request them to wear skin-fitting clothes
- Place markers on anatomical landmarks based on what parameters you want to assess.
- Optimise the camera settings and place them in appropriate locations.
- Ensure optimal lighting and proper camera alignment.
- Instruct and cue the patient to walk on the walkway/treadmill for a few minutes, so they get comfortable and less camera-conscious.
- Upload the captured data on the software
- Analyse the joint angles on the software.
- Interpret the data based on the range of motion, muscle action, and deviations and create a management protocol
- You can also use the data as biofeedback and analyse pre-post results.
Cost-effective software for Gait Analysis
While there are quite a few, before choosing a software, get acquainted and trained in its specifications, how to use it, and what suits your needs the best.
- Kinovea (Free and paid versions)
- Dartfish (Free trial and paid versions)
- OnForm – Mobile app
We’re also happy to inform you that GaitON software also has an inbuilt Gait Analysis module which is now used by 300+ clinicians globally for gait assessments. It provides patient-friendly reports with reference values, automatic notes, pre-post analysis, excel export options and many more!
Reach out to us today to learn more about the GaitON software and set up your own Gait Lab!
Since you’re here…
…we have a small favor to ask. More people are reading our blogs everyday, and each week we bring you compelling content to help you treat your patients better. Please take a moment to share the articles on social media, engage the authors with questions and comments below, and link to articles when appropriate if you have a blog or participate on forums of related topics. — Team Auptimo
ABOUT THE AUTHOR

GAYATRI SURESH (PT)
Gayatri Suresh (PT) is a Biomechanist who has completed her B.P.Th from DES College of Physiotherapy and M.P.T (Biomechanics) from SRM College of Physiotherapy, SRMIST. Her field of clinical expertise is in movement assessments through video analysis. Apart from her work at Auptimo, she works as a Clinical Specialist at Rehabilitation Research and Device Development, IIT Madras. She has been conferred with gold medals for her Research presentations and for securing First rank with distinction in her MPT degree respectively
REFERENCES:
- Windt, Johann & Taylor, David & Zumbo, Bruno & Sporer, Benjamin & Martin, David. (2020). ”To Tech or Not to Tech?” A Critical Decision-Making Framework for Implementing Technology in Sport. Journal of athletic training. 55. 902-910.
- Finkbiner MJ, Gaina KM, McRandall MC, Wolf MM, Pardo VM, Reid K, Adams B, Galen SS. Video Movement Analysis Using Smartphones (ViMAS): A Pilot Study. J Vis Exp. 2017 Mar 14;(121):54659.
- Parks MT, Wang Z, Siu KC. Current Low-Cost Video-Based Motion Analysis Options for Clinical Rehabilitation: A Systematic Review. Phys Ther. 2019 Oct 28;99(10):1405-1425.
- Peart, Daniel, Balsalobre-Fernández, Carlos and Shaw, Matthew (2019) The use of mobile applications to collect data in sport, health, and exercise science: a narrative review. Journal of Strength and Conditioning Research, 33 (4)